10 KiB
Snappy
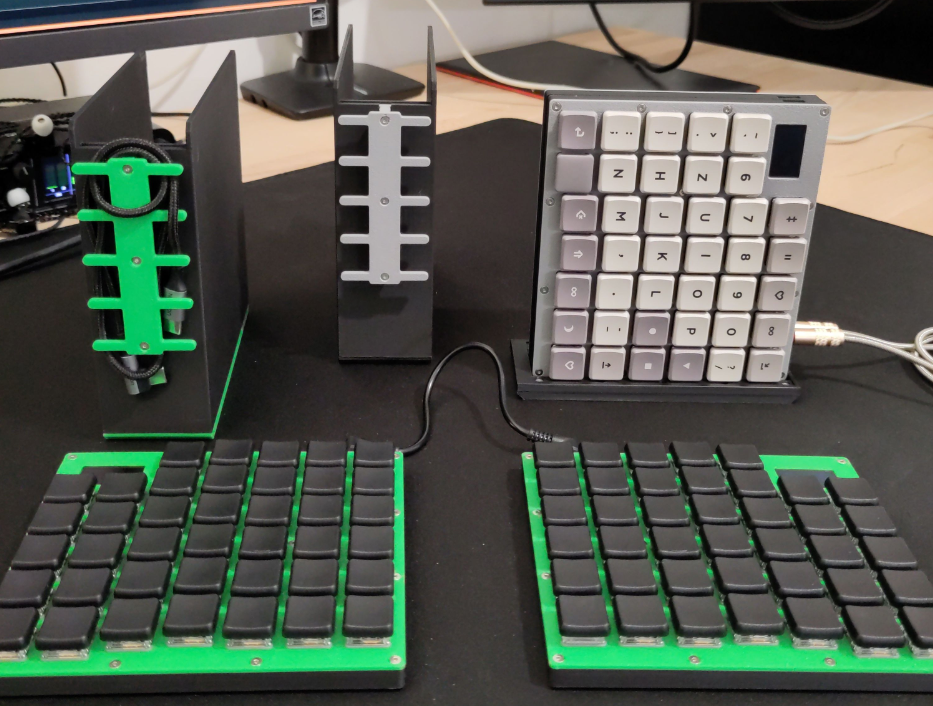
Snappy is a custom, QMK-based split keyboard designed for simplicity, with a focus on portability and repairability.
After using multiple different custom keyboards over the span of 2 years I identified the following requirements that I deemed important:
- Spilt keyboard with individually usable halves
-
Reasonable amount of usable keys while maintaining low footprint
- Dedicated number row
- Some function keys
- Extra columns
- No rotation or special placement of thumb keys
- Low profile switches for comfortable usage w/o wrist rests or tilt kit
- Good portability, ideally with a matching carrying case
-
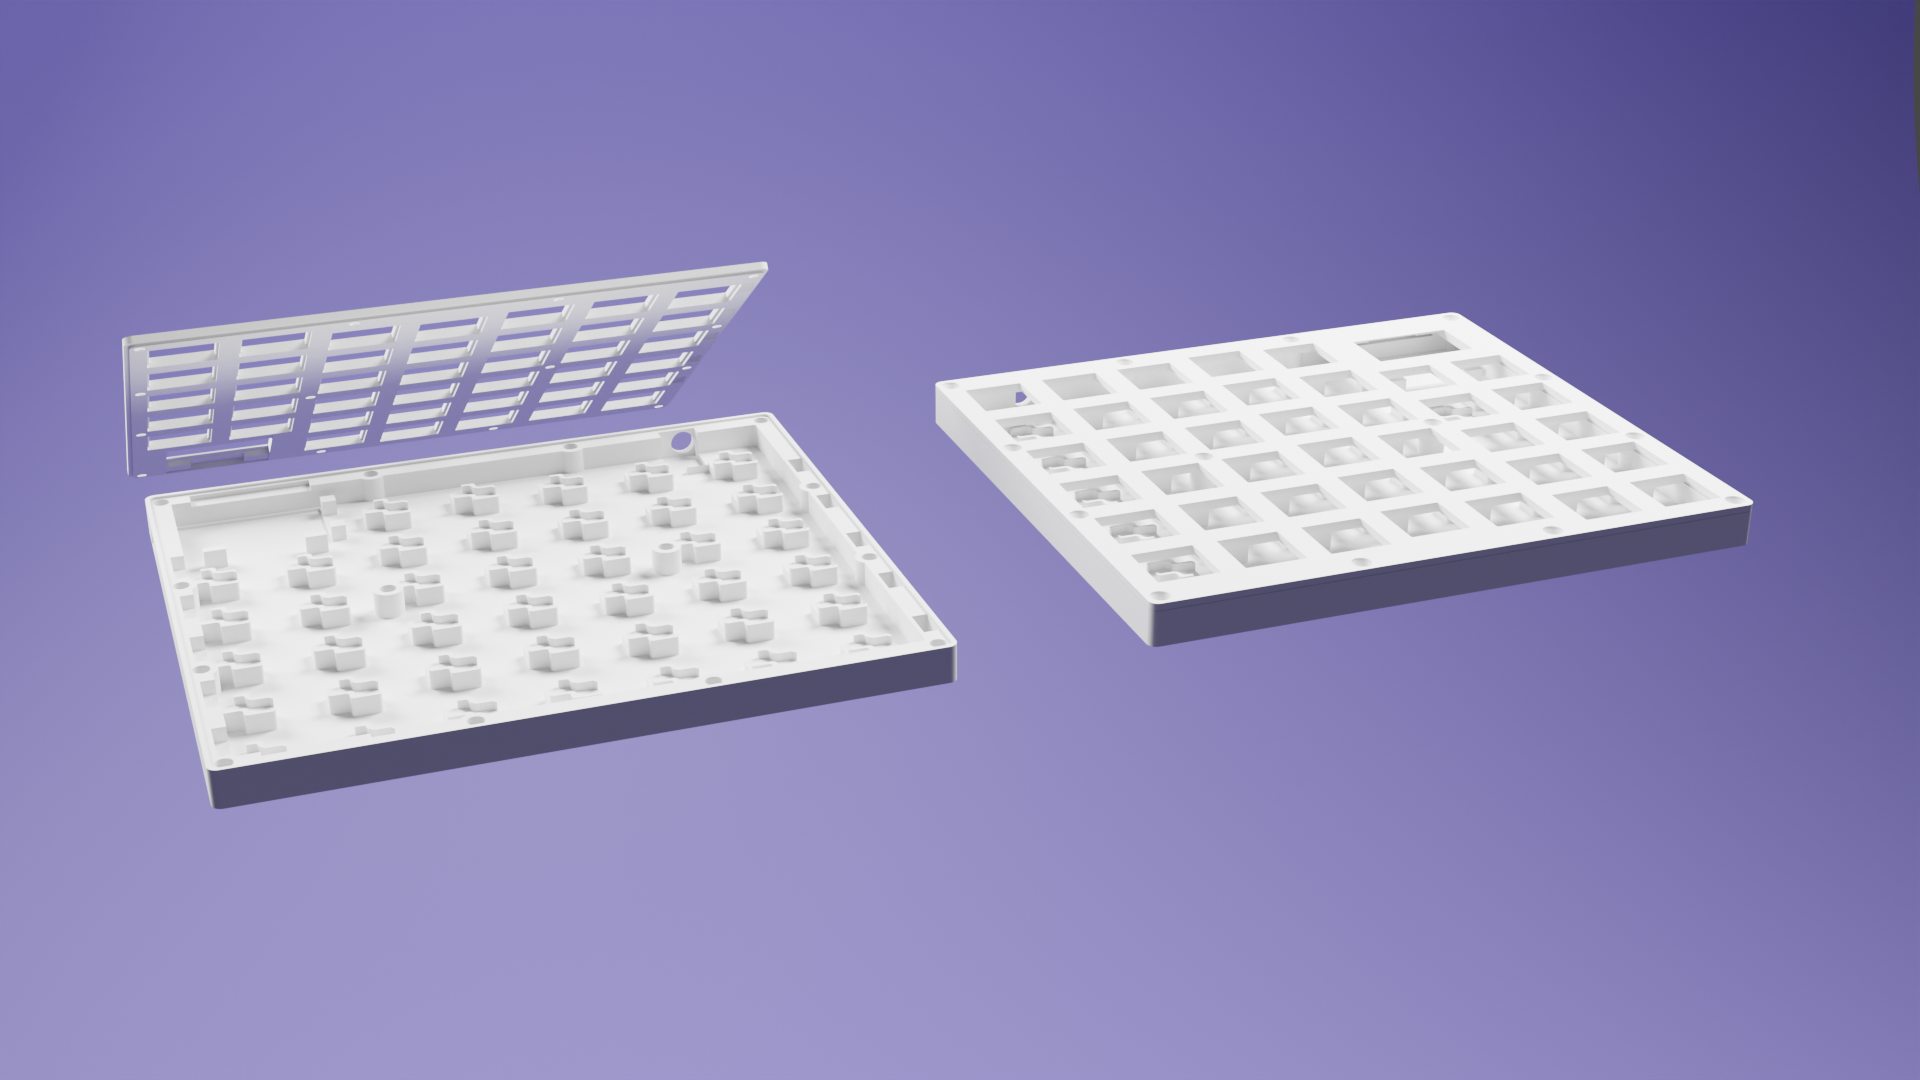
Mostly 3D printable
-
Individual Parts should be replaceable without re-soldering anything
- Top Plate
- Bottom Housing
-
-
Handwired version
- Support vor hotswap sockets !Kailh only!
- OLED display
- PCB version
-
Wireless version
- This version might feature a battery in place of the OLED display
-
Some Accessories
-
Carrying case
- Features a dual function cable holder / connector for halves
- Portable mini tilt kit
- Stationary tilt kit(s)
-
As observable in the list above many of the requirements and ideas have already been implemented during the last three iterations of Snappy. The remaining ideas will be implemented in no particular order or timeline.
Bill of Materials
Snappy BOM (English)
TODO: BOM in English
Snappy BOM (German)
Grundsätzlich ist es empfohlen für die Handwired version mit Hotswap Sockets Kailh V1 Switches zu verwenden. Wir haben jedoch auch schon eine Snappy mit Kailh V2 Switches gebaut was auch funktioniert hat, jedoch aufgrund der minimal größeren Switches, vor allem der größere Durchmesser des "Center Mast" führt zu etwas Spannung der "Top Plate" und bedarf etwas mehr Vorsicht beim späteren zusammenführen der gelöteten matrix aus Hotswap Sockets und "Bottom Housing". Mit etwas Geduld und Gefühl klappt das dann aber auch.
Bei allen Bauteilen die man löten muss, gerade als Anfänger, lieber ein paar mehr besorgen. Je nachdem ob ich das Filament schon in der Farbe habe oder nicht kann man den Preis vom Filament für die gesamte Tastatur + Case + Tiltkit auf ca 10 € runter schrauben.
Snappy v3 Tastatur (mit Hotswap):
-
80x Kailh V1 (Choc) kompatible Keycaps (ca. 50 € - 100 €, je nach KC & Angebot)
- Work Louder
- MBK Legend
- MBK PBT Coloured Blank Keycaps (Homekeys nicht vergessen)
-
80x ACHTUNG -> MX/Kailh V2 kompatible Keycaps (ca. 50 € - 100 €, je nach KC & Angebot)
-
80x Kailh V1 Keyswitch (ca. 40 € - 85 €, je nach Switch & Angebot)
-
2x RP2040 Pro Micro 16M (ca. 8 €) || 2x Liatris (ca. 35 €) || 2x 0xCB Helios (ca. 32 €)
-
80x Hotswap Socket für Kailh V1/V2 Switches (ca. 10 €)
-
80x 1N 4148 Schalt-Diode, 100 V, 150 mA, DO-35 (ca. 1 €)
-
2x OLED Display 128x64 (i2c -> GND,VCC,SCK,SDA) (ca. 3 €)
-
2x TRRS Jack (ca. 1 €)
-
1x 0,3mm - 0,6mm TRRS Kabel (Am besten 90deg Winkel) (ca. 2 €)
- Beispielhaftes Produkt
-
- In die Notiz vor dem Kauf schreiben: 90 TRRS to 90 TRRS, straight type, 30CM, Inner Color: 32 (Black) + Outer Color: Red, Black heatshrink.
-
ca. 400cm, Kupferlackdraht Ø 0,30mm - 0,40mm (ca. 3 €)
-
28x Heat Insert M2(OD3.2mm, H3mm oder 4mm) (ca. 2 €)
-
28x M2 Schraube H6mm (ca. 1 €)
-
10x 7mm x 3mm Neodym Magnet (ca. 1 € - 10 €)
- Beispielhaftes Produkt (Sehr gute Qualität, Haltkraft und schnelle Lieferung)
-
8x 8mm x 2mm Gummi Füße (ca. 1 €)
-
1x 0,5m USB-C Kabel (ca. 5 €)
-
3D Druck Filament in Farbe eurer Wahl (PLA, PET-G) (ca. 10 € - 30 €, je nach Farbe, etc.)
- Für Mehrfarbige Prints dann natürlich mehrere Farben
Günstig (MC, KS, KC): ca. 98 € Teuer (MC, KS, KC): ca. 215 € Restliche Kleinteile: 50 € Gesamt: ca. 150 € - 270 € (+- 20€, je nach aktueller Preislage)
Carry Case + Snappy Connector/Cable Organizer:
-
14x 7mm x 3mm Neodym Magnet (ca. 1 € - 10 €)
- 10x Case + 4x Snappy Connector
- Beispielhaftes Produkt (Sehr gute Qualität, Haltkraft und schnelle Lieferung)
-
9x Heat Insert M2(OD3.2mm, H3mm) (ca. 2 €)
-
6x M2 Schraube H6mm (ca. 1 €)
-
3x M2 Schraube H12mm (ca. 1 €)
-
3D Druck Filament in Farbe eurer Wahl (PLA, PET-G) (ca. 10 € - 30 €, je nach Farbe, etc.)
- Für Mehrfarbige Prints dann natürlich mehrere Farben
Gesamt: ca. 10 €
Other Accessories (Tilt Kits, Show Stand, etc.) JEWEILS:
-
10x 7mm x 3mm Neodym Magnet (ca. 1 € - 10 €)
- Beispielhaftes Produkt (Sehr gute Qualität, Haltkraft und schnelle Lieferung)
-
3-6x M2 Schraube H6mm (ca. 1 €)
-
3-6x Heat Insert M2(OD3.2mm, H3mm) (ca. 2 €)
-
3D Druck Filament in Farbe eurer Wahl (PLA, PET-G) (ca. 10 € - 30 €, je nach Farbe, etc.)
- Für Mehrfarbige Prints dann natürlich mehrere Farben
Gesamt: jeweils ca. 10 €
Build Instructions
TODO: Nice guide how to build Snappy